Saturday, January 29, 2011

Completed..... For Now

One-tonne lorry booked for Monday, 31st Jan to transport my queen size mattress, some loose furniture and boxes of stuff to the new condo. Last minute repair work for the kitchen roller shutter, painting of the doors and some plumbing works to be done at the same time. 

All other rectification work will resume around mid-Feb after the Chinese New Year celebrations. I have a very long shopping list and an equally long to-do list to complete. Then it's a rush back to my hometown to spend time with my immediate family and back to work on 3rd day of CNY. Anyway, here's wishing everyone a very joyous CNY celebration! 

Here are some pics of the kitchen & dining area:


Wednesday, January 26, 2011

Almost there.....

Yard area : 7-ft long counter with solid surface top and Blum drawers.

 Wall cabinets in Master Bedroom
Aluminium frame with black glass door and lift up opening mechanism

Walk-in Wardrobe in Master Bedroom by Fiorenza. 
Has black glass drawers and shelves.

 Master Bathroom

 Living Room & feature wall

Evan's room with built-in bed & pull-out bed, shelves, wardrobe, study table and bench. Pic above shows walk-in wardrobe (internals only) by Fiorenza.


Alpha baby fan and downlights in Evan's room

 
 GlassKote backsplash & Bareno Sink

Plaster Box-up done to conceal cooker hood ducting

Counting down to moving house! Date set for the last day of January. Unfortunately, have not bought new TV yet. We are keen to buy Sharp's Charisma 32" LCD TV in White. I asked Evan what TV he wanted, small or big? He answered BIG. Then I asked him whether he wanted a black TV or white TV. Then he answered BLACK. Hubby then asked him to choose between a BIG WHITE TV or SMALL BLACK TV. Evan answered BIG BLACK TV. Anyway, we will just use our faithful little silver TV for now.

Friday, January 21, 2011

Work in Progress

Evan's room. Many mistakes here - wrong dimensions, wrong colour and wrong door type. Have to redo some of the cabinets and install them after Chinese New Year. My ID has to draw out the plans again and re-submit them to the factory.


Living room cabinets. Mistake with the feature wall on the right side - wrong position. Again, to rectify after Chinese New Year.

Cooker Hood installed - will need to do the plaster box up to cover the unsighly ducting

Kitchen almost completed. Do the pendant lamps look small??? Will stick to this first until I find something more suitable.

Console with magnetic board at entrance. Initially was in wrong position. Now rectified. Shoe cabinet can be partially seen outside.

 Walk-in wardrobe in Master Bedroom by Fiorenza

Countertop at the yard for storage/ironing or cooking with free-standing induction hobs or to cook rice/porridge.


Cabinets and wall mirrors for the master bedroom bath. Initially the wall cabinets were too deep and too near the mixers. Now, the depth has been reduced into half and there's enough clearance for the mixers.

Monday, January 17, 2011

Parent & Child Cooking Class

 The Cooking House at Desa Sri Hartamas

 Parent & Child Cooking Class - Petit Cakes
16th Jan 2011 from 3-5pm
RM100 per pair. Additional RM50 charged per additional child/adult

First up, we watched the demo on how to bake the butter pound cake. Really simple recipe. This is something beginner cooks can do easily.

There were over 10 pairs of mommies & kids. Most of the kids were girls too. Pic above shows demonstrator pouring the cake batter into the cake tin.

The recipe calls for 175g of pure butter - we used Anchor pure salted butter so no need to add salt to the batter already. Add 100g of sugar or less if desired. A mixture of brown sugar can also be used. Then mix the butter and sugar together until it's pale & fluffy. Then add 3 eggs one by one into the batter, mixing after each addition. After that, half a teaspoon of vanilla essence goes inside the batter.

Next comes the 'snow'! Sift 120g of plain flour with one third teaspoon of baking powder. Sift half of the quantity then fold before sifting the rest of the flour in. Lastly add 2 tablespoons of milk. Lined the baking tray & pour in the batter. Bake in a pre-heat oven 165 degrees celcius for 20 minutes. Insert a skewer inside the cake & it should come up clean.

While waiting for the cake to bake, all the kids were given a cake box and crayons to decorate.

Once the cakes are ready, use a round mould or cutter to cut the cake and stack them up on each other.

We then watched another demo on how to prepare the cream. Pour 1 cup of whipping cream and whip the cream until stiff.

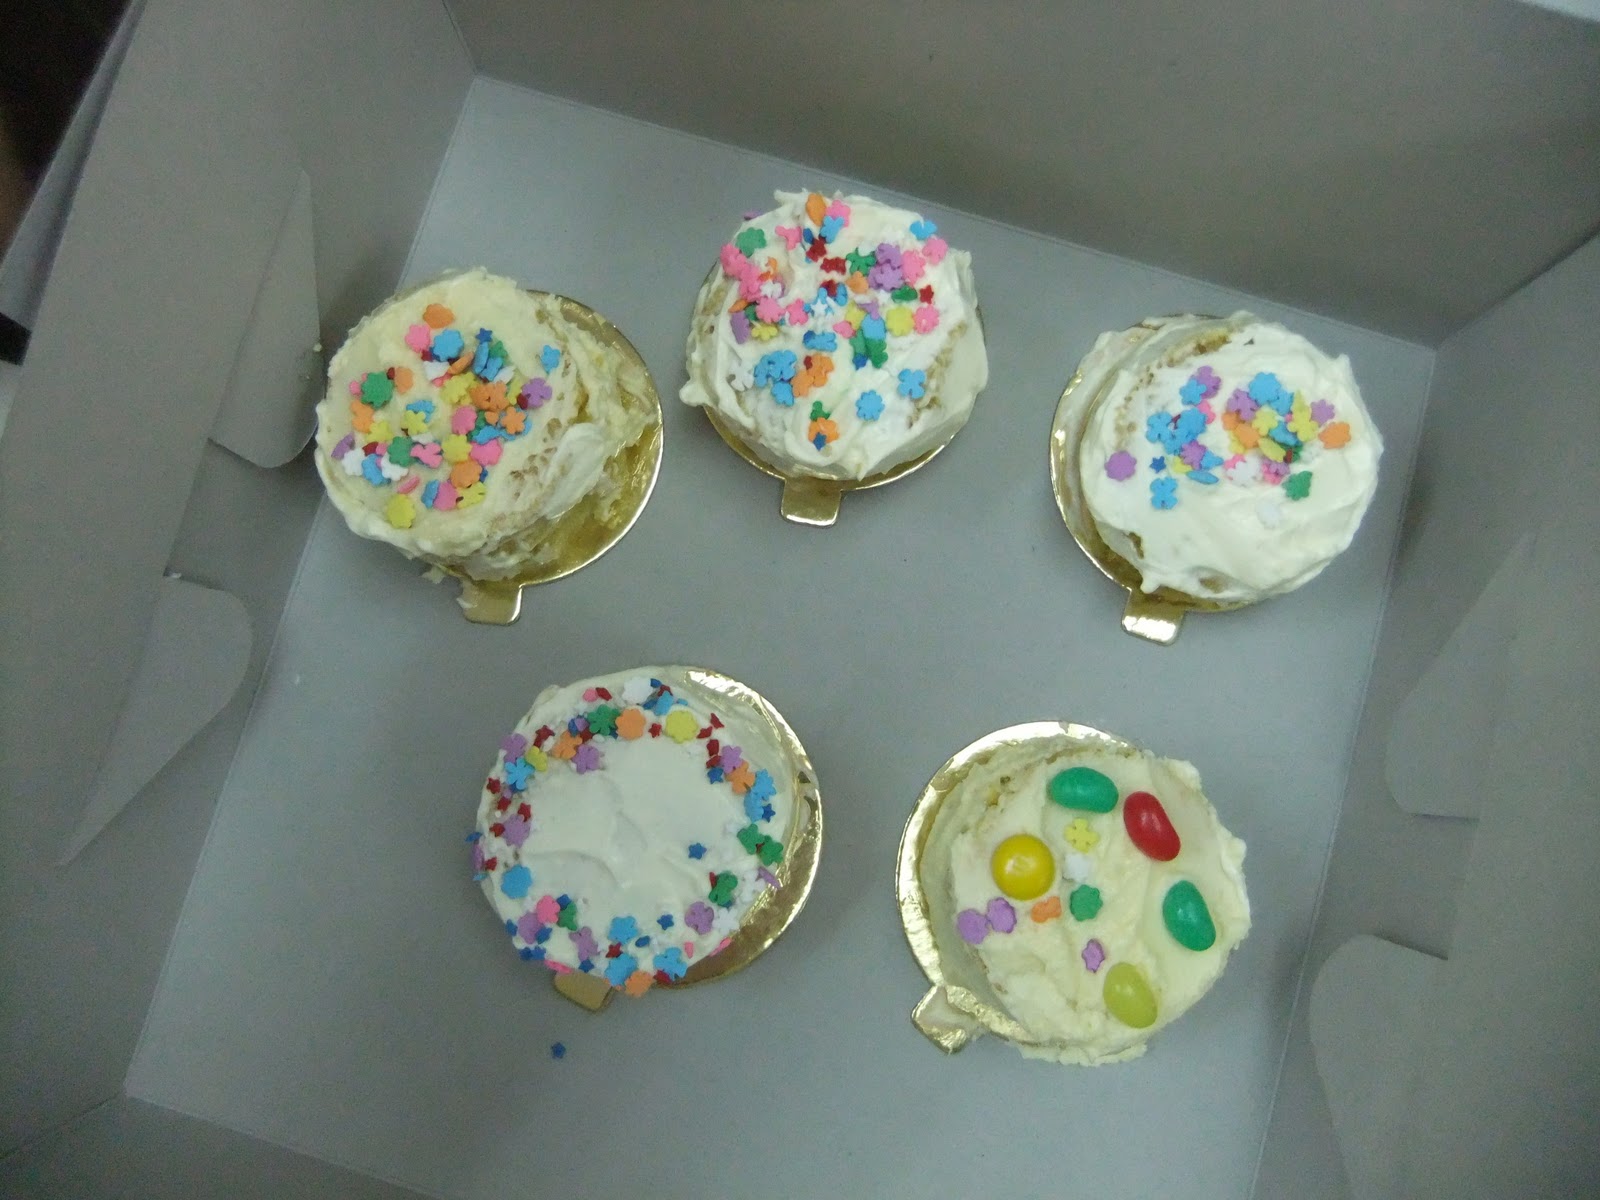
 Spread it on the cake and decorate it with M&M's and jellybeans

At this point, Larry & Marissa came along and joined the class briefly, as it was almost 5 o'clock already. Evan happily ate all the sugar decorations in the bowl.

We munched on the butter cake & it was delicious! We brought back 5 of our creations! Whipped cream needs to be refridgerated though. Another alternative is to use buttercream which is sweeter. To make buttercream, just combine butter and sugar together. Then the cake can be kept at room temperature.

Overall - very informative, practical hands-on class for the novice baker - just like me & Evan.

Monday, January 10, 2011

A Belated New Year's Wish

Here's a belated New Year Wish to all of you - my faithful readers!

Been super busy lately with stressful renovation works. More and more mistakes discovered - my mobile phone bill & blood pressure already skyrocketing.... 

Anyway, some pics of the kids and the stuff they do at the backseat of the car....