Tuesday, April 26, 2011

Cupcake Decorating

Completed my 3rd Wilton Method Basic Cake Decorating class during the weekend. Did lots of piping work and decorated cupcakes using the new techniques - see pic above - not quite a pretty sight - everything so messy and colors all just simply mix and match.

Anyway, i baked and frosted mini cupcakes for my church's Easter Oikos Lunch. My very first attempt: mini butter cupcakes with pink & violet butttercream frosting in classic swirls topped with pastel colored sprinkles. It was a hit with the kids who like the sweet frosting (some adults find it too sweet for their liking). No leftovers.


Thursday, April 21, 2011

Wilton Method Basic Cake Decorating Course .... part 2


Attended the second lesson of the Wilton Method Basic Cake Decorating Course. Baked my 8" cake and frosted it. This lesson, we revised the method for preparing buttercream frosting and also the techniques for frosting a cake. The three keys to successful cake decorating : icing consistency, bag position and pressure.
Vivian, the instructor showed us how to do a pattern transfer using piping gel. Learnt a few more piping techniques using tip #12 and #18.

Ta-daaaaa my decorated cupcake cake! The cupcake pattern is shown on the left of the cake. For the next class, students are required bring 6 unfrosted cupcakes.

Was free the other day, so decided to try baking some cupcakes using a new recipe that I found on joyofbaking.com.

Tried my hand at frosting them using the 1M tip in my student kit. Not sure whether it's the correct way cos my instructor has not taught us how to use the tip yet but looks good enough to me! The cupcakes were not very sweet but eaten with the sweet frosting, tastes just nice! Will attempt to bake some mini cupcakes for Easter Sunday Lunch in church. Off to buy a mini muffin cake pan and some baking cups!

Saturday, April 16, 2011

36th Birthday

Hubby was away for a meeting one night so I got Evan to draw a card for his 36th birthday. Here Evan is all set to draw and color. He ended up coloring with color pencils instead of oil pastels cos his drawing is very small.

It's a drawing of Hubby and himself chillin' out with sushi and Boost juice! Evan wrote I Love You Daddy on the card instead of Happy Birthday! Then we slipped the card onto the birthday pressie under the ribbon. The kids gave the pressie to Hubby the next morning and even helped him to open it.


I was busy in the kitchen - baking and frosting the birthday cake. My first time icing a cake! Doesn't look too good...... but at least the cake is edible - moist and buttery! The kids love the icing which was super sweet!

 For dinner we went out to Mid Valley Megamall - Eu Yan Sang. 

 Evan had fried lotus leaf rice which was very tasty - RM10.

 I ordered their signature stir fried noodles RM12 which was also very tasty.

The birthday boy had hor fun with beef RM12 also but he said it was rather bland and proceeded to add some soy sauce into it.

Happy 36th birthday dear Larry!

Friday, April 15, 2011

Dinosaur Party

Priscilla emailed me an invite to Joseph's Dino Party about a month ago. Naturally, Evan was so excited! He absolutely loves parties so much so that he can't stop talking about his coming LEGO 6th birthday party (August) - which is still in the planning stage. Anyway, back to the Dino Party, it started at 5pm on a nice cool Sunday evening. Marissa was really down with a nasty virus and she only woke up fifteen minutes past five o clock. We rushed there and managed to be on time for the action song and performance by Uncle Billy the Clown....who is actually Joseph's uncle!

This time Uncle Billy performed a whole lot of new tricks which were so entertaining and funny. Evan certainly enjoyed himself as he was picked to assist in one of the tricks. I was surprised that he participated in all the singing, games etc. I thought he would be running around instead. 

The kids also had some games coordinated by Uncle Billy with prizes to be won. After all that fun, it was cake cutting time! The birthday cake was a Japanese cheesecake with a prehistoric scene of ferocious dinosaurs overturning cars..... and a volcano spewing out chocolate lava. Food was catered  - pasta, mashed potatoes, sausages, cupcakes, sandwiches etc. Evan was very happy that one of his ASP friends, Clarysse was there as well. 

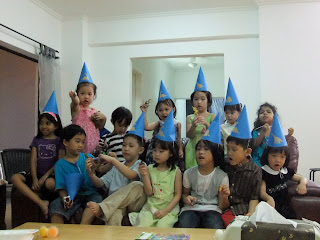
All the kids wearing their special handmade dino party hats and roaring like dinosaurs! 

The kids were all given a custom made magnetic photo frame with a thank you note from Joseph. Needless to say, Evan enjoyed himself the most! Me too!

Monday, April 11, 2011

Wilton Method Cake Decorating Basic Course


Venue : Rosa 1 Room, The International Center of Cake Artistry (ICCA) main branch : Dataran Sunway.
Date: 9th, 16th, 23rd & 30th April 2011
Time : 10:30am-12:30pm
Fees : RM500
Wilton Method Instructor : Vivian Tan

Cake decorating! Actually wanted to enroll for the Better Baking Course since I am a beginner but the course is only on Sundays.... and it will clash with Easter. So, decided to try cake decorating first. Received a student kit and lesson plan at my first class. The student kit includes piping bags, decorating tips, couplers, spatula, practice board etc. Total of 8 students in the class inclusive of one guy!

Very informative and practical class by WMI : Vivian Tan (see pic above) - who has been with ICCA since its inception.

Watched her demo on how to prepare buttercream frosting and how to tort & frost a cake. Gasp! Homework! Have to bake an 8" cake, frost it and bring it to class next week! Stress levels are soaring high!


Good thing that ICCA stocks baking goods and ingredients in its store on the ground floor.... so I had no problems looking for the meringue powder, butter flavour, icing sugar etc to prepare buttercream frosting.

Piping technique shown on the practice board using Star Tip #18.

Practiced piping stars on Digestive cookies during the class.

At home, Evan & Marissa got to play with my piping bag filled with pink buttercream frosting. They decorated a few cookies and walloped some of them! Looking forward to the next class!

Friday, April 8, 2011

Sausage Puffs

Just to share a simple recipe on sausage puffs - ideal as appetizers for parties, tea time or just because. I really like this cos it's simple, fast and delicious too!


Ingredients :
1) Nutriplus Cheese Chicken Franks - 4pcs (Each pack contains 6)
2) Borg's puff pastry or butter puff pastry - 1 sheet (Each pack contains 4-7 sheets)
3) An egg - lightly beaten
4) Heinz mustard or for a sweeter taste : Honey mustard (see pic below)

Equipment:
1) Silicone baking sheets
2) Pastry brush
3) Bowl/Fork
4) Knife

 Pre-heat the oven at 180 degrees Celcius.

Remove a sheet of puff pastry from packaging and place on silicone baking sheet.  The puff pastry should be still cold from the freezer. Do not thaw it or it will be difficult to handle. Make sure the chicken franks are thawed though. You can choose any chicken franks/sausages e.g. garlic, mushroom etc. but I find the ones with cheese are juicier to the bite!


Divide the puff pastry sheet into 4 equal squares. Squeeze a dollop of mustard on the center of each square and spread evenly using a fork or the pastry brush. Then place the chicken frank on top and roll it tightly.

Use a knife to slice each roll into 4 parts. After that, arrange them on the baking tray lined with silicone baking sheet or baking paper so the pastry doesn't stick on the tray. 


Using the pastry brush, cover the pastries with the egg. This will make the bake the pastry golden brown. Pop them in the oven for 20 minutes or more until golden brown.


Cool them on a wire rack and eat them whilst hot so they are super crunchy!

Monday, April 4, 2011

Traumatized Tooth

Evan slipped after coming out of the bathroom all wrapped up in his towel. Without any hands to break the fall, he suffered a gash on his lip and there was also bleeding from his teeth. That was about a month ago. Recently I noticed a 'pimple' on the gums above that particular tooth.

It was also mobile and painless. I brought him to the clinic after school one day for treatment.
Since the tooth is dead - hence the pus oozing out of the gums...... it's necessary to have it disinfected. 
So, what I did was just to drill a cavity into the pulp of the tooth and disinfect it with a disinfectant solution.


I also took a radiograph of the tooth with a file inside to determine the length of the tooth. Well, not much of a root left.... less than half! His permanent teeth are already resorbing the roots of the milk teeth.

After disinfecting, a non-setting calcium hydoxide paste is placed inside the tooth. A filling is then placed on the tooth to cover the cavity. If all goes well, the 'pimple' on the gums will disappear!